Silicone mold making is one of the most useful skills a maker can pick up. With a single good mold you can copy a sculpture, cast candles, pour resin charms or run small batches of prototype parts. The process looks simple, yet small slips with materials and timing ruin most first attempts.
This guide covers everything from choosing the right silicone to fixing a mold that will not cure. It shows how to make silicone molds that work first time and flags where online advice conflicts.
Key Takeaways
- Good silicone mold making starts with choosing the silicone. Platinum-cure and tin-cure types behave differently, and hardness changes how easily a mold releases.
- Many failures start with the master, not the silicone. Porous, sticky or uncured surfaces can leave a mold tacky or ruined.
- Use a one-piece mold for parts with a flat back. Choose a two-piece silicone mold for full 3D shapes and undercuts.
- Follow the datasheet for mix ratio, cure time and temperature limits, because general claims about silicone mold making vary widely.
- Gentle cleaning and flat storage help a mold last, but lifespan depends on the design and how often you cast.
What Silicone Mold Making Involves
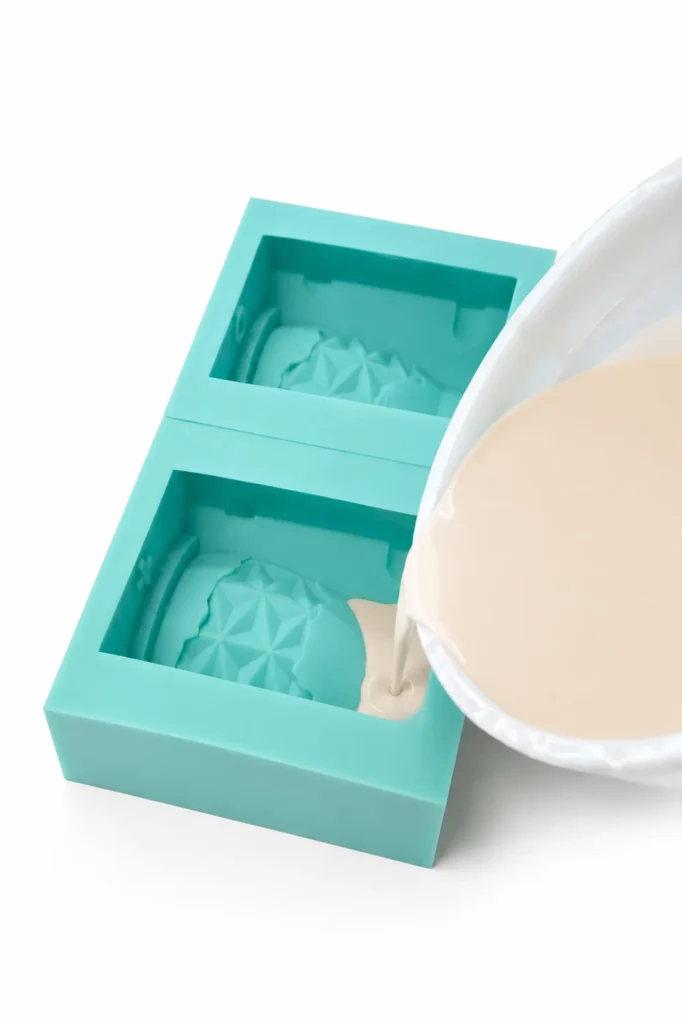
You place a master, which is the object you want to copy, inside a box. You pour liquid silicone around it and let it cure into flexible rubber. Then you peel the rubber away to leave a cavity.
That cavity is your mold, ready to fill with wax, resin, soap or concrete.
Choosing the Right Silicone for Silicone Mold Making
Not all silicone rubbers are the same, and in silicone mold making the wrong choice costs both money and time. Most studio silicone molding uses liquid, two-part silicone that cures at room temperature. Putty-style silicone is the other common option and suits small, simple molds.
The biggest split is the curing chemistry. Platinum-cure silicone generally costs more, but it tends to hold its size over time and shrinks very little. Tin-cure silicone costs less, though it is usually less stable and may shrink more. If accuracy matters, as with a jewelry pattern, the extra cost is worth it.
| Type | Best for | Watch out for |
| Platinum-cure liquid | Precise, long-lasting molds | Higher cost, and it can be blocked by sulfur, latex and some resins |
| Tin-cure liquid | Casual crafts and tighter budgets | More shrinkage and less long-term stability |
| Silicone putty | Quick jobs and small, simple shapes | Usually less suited to large or highly detailed molds |
Hardness matters too. Soft rubbers are rated on the Shore A scale. Softer silicone peels off complex shapes more easily, while firmer silicone holds its shape better on flat or simple designs.
If the mold will touch skin or food, look for a product whose datasheet says it is suitable for that use. Never assume any silicone is.
Follow the product’s stated cure time. Cure time can vary by product and conditions, so the manufacturer’s instructions are the best guide.
Leave about 1 cm of space around and above the master so the mold walls have enough thickness.
Choose the hardness based on the shape. Softer silicone can make complex shapes easier to demold, while firmer silicone can better support simple shapes.
Choose the cure type that suits the project. Platinum-cure and tin-cure silicones can behave differently.
Check the silicone’s tear strength, especially for molds with thin sections or complex shapes.
A durable silicone mold starts with the right silicone and the right design.
How to Make a Durable Silicone Mold
A long-lasting mold needs enough strength to resist tearing, especially around thin or detailed areas. The cure type affects how the silicone sets, while the right hardness helps balance flexibility and shape support. Keeping about 1 cm of silicone around and above the master gives the mold a stronger wall, and allowing the full recommended cure time helps it reach its intended properties.
Preparing the Master and Mold Box for Silicone Mold Making
The master can be clay, carved wood, a 3D print or an existing item. Whatever you choose, it needs a clean, smooth surface, because silicone picks up every detail, including layer lines and fingerprints.
- 3D-printed masters: wash them thoroughly and cure them fully. Sticky residue can stop silicone from setting.
- Porous masters: raw wood and plaster are often sealed first so the silicone does not soak in.
- Clay and latex: sulfur-based clays and latex can interfere with platinum-cure silicone, so test a small area first.
Build the mold box from a non-porous material with a flat base, such as coated board or a plastic container. Fix the master in place so it cannot float or shift. Leave about a centimeter of space around and above it so the mold walls stay thick enough to last.
To avoid running short, fill the empty box with water, pour it into a measuring jug and subtract the master’s volume. Then check whether your silicone is mixed by weight or by volume, and make a little extra.
One-Piece or Two-Piece Silicone Mold: Which Do You Need?
A one-piece mold works like an ice cube tray. You lay the master flat side down, pour silicone over it and pull the master out once it cures. It is quick and seamless, but it only suits shapes with a flat back and few undercuts.
A two-piece silicone mold splits into halves so you can copy a full 3D object. You bury half the master in clay, pour the first half, remove the clay and pour the second half on top. It takes longer, and seams can show if the halves do not sit flush.
- Add alignment keys, which are small bumps and divots, so the halves line up the same way every time.
- Add a pour hole and a few tiny air vents so casting material fills the cavity without trapped air.
- Apply release agent between the halves, because fresh silicone can bond to cured silicone.
Mixing, Pouring and Curing Silicone Without the Usual Mistakes
This is where most silicone mold making mistakes happen, so slow down and keep to this order:
- Measure exactly as the datasheet says. A wrong ratio is a classic cause of molds that stay soft or tacky.
- Mix slowly, scraping the sides and bottom of the cup so no unmixed material is left behind.
- Remove trapped air by tapping, gentle vibration or a vacuum chamber if you have one.
- Pour a thin stream into the lowest corner of the box and let the silicone rise over the master.
- Leave it alone for the full cure time.
Cure times range from about ten minutes for some putties to a full day for some liquids. Also note the pot life, which is the short window before the mix starts to thicken. Warmth and humidity can change both, so trust the datasheet over the clock.
De-Molding, Casting and Caring for Your Silicone Mold
Consistent silicone molding results depend on a careful finish. Peel the mold away gently, starting at the edges, and avoid sharp tools. Silicone is flexible, but it can tear if you stretch it too far or pry at a thin section.
Most castable silicones do not stick to common casting materials. A light coat of release agent can still help with deep details or sticky resins, while some silicones are designed to release without any agent. A few habits also protect the time you put into silicone mold making:
- Wash with mild soap and water, then dry the mold completely.
- Store it flat and avoid stacking heavy items on top.
- Check for small tears before each session, since thin walls fail first.
There is no fixed number of uses. Detailed designs, frequent casting and harsh casting materials wear a mold out sooner.
Fixing Common Silicone Mold Making Problems
Most silicone mold making problems trace back to a handful of causes.
| Problem | Likely cause | What to try |
| Sticky or soft mold | Wrong ratio, poor mixing, a cold room, or a master that blocks curing | Re-measure, mix thoroughly, and clean or seal the master |
| Air bubbles on the surface | Air trapped while mixing or pouring | Remove air before pouring and use a thin stream |
| Tearing when demolding | Thin walls, pulling too hard, or silicone too firm for the shape | Leave thicker walls and choose a softer, tear-resistant silicone |
| Visible seams | Mold halves that do not sit flush | Add alignment keys and check the fit |
Where Silicone Molds Work Best and Where They Struggle
Silicone mold making suits jewelry wax patterns, candles, soap, chocolate, concrete tiles, resin art and small-batch prototypes. It captures fine detail and releases easily.
Silicone mold making is not perfect. Silicone usually costs more than latex, it can tear, and quality varies between suppliers. Silicone molding suits prototypes and small batches, but for large production runs hard tooling is usually the more economical route.

What the Evidence Says About Silicone Mold Making
Most published material on silicone molding comes from manufacturers and suppliers. That does not make it wrong, but it does mean some claims are broad and untested on your particular project.
- Well established: Silicone rubber is flexible, captures fine surface detail and does not bond to most casting materials. Platinum-cure and tin-cure systems differ in cost and stability. Cure inhibition, where a material stops silicone from setting, is a documented problem.
- Manufacturer-stated: Temperature limits, food-contact suitability, tear strength and cure times. These vary by product. Published temperature ranges differ widely, and a general figure for silicone as a material can be far higher than the rating of a specific mold-making grade.
- Still unclear: How many casts a mold will survive. No single figure fits every design, silicone and casting material.
Faqs
How to make silicone molds at home?
Choose a two-part silicone, fix your master inside a non-porous box, mix by the datasheet ratio and pour slowly. Let it cure fully, then peel the mold off the master. Use a two-piece silicone mold if the shape has undercuts.
What is the best silicone for silicone mold making?
There is no single best. Platinum-cure silicone is usually the safer choice for accurate, long-lasting molds, while tin-cure suits casual projects. Match the hardness to your shape and check the datasheet for food or skin safety.
Do you need mold release for silicone mold making?
Often it helps, especially between mold halves or with sticky resins. Some silicones release without it. Check the datasheet and test on a small part.
How long does silicone take to cure in a mold?
It depends on the product, from about ten minutes for fast putties to a full day for some liquids. Temperature and thickness also change the time.
Why is my silicone mold sticky or not curing?
The usual causes are a wrong mix ratio, poor mixing, or a master that blocks curing, such as uncured resin, latex or sulfur clay. A cold room can slow things down. Remake the mold with a sealed, clean master.
Is silicone mold making safe for food projects?
Only if the product is stated as suitable for food contact. Ordinary mold-making silicone may not be. Read the datasheet before pouring anything you will eat.
Can you use silicone caulk for silicone mold making?
Some people do, usually mixed with a thickener such as cornstarch. It can work for simple shapes, but results are typically less detailed and less durable than mold-making silicone.
Bottom Line
Silicone mold making rewards patience and preparation more than fancy equipment. Pick the right silicone, prepare a clean master, measure carefully and give the mold its full cure time.
What is well established is how the main silicone types differ, and why clean masters and correct ratios matter. What is less certain are exact temperature limits, lifespans and food-safety claims, which depend on the product. Read the datasheet for your silicone, and test a small batch before committing to a large silicone mold making project.
Once you know how to make silicone molds that release cleanly, every project gets easier.