A silicone bottle brush looks like the simplest tool in your kitchen drawer. Then you try to clean a narrow-necked bottle with dried milk stuck at the bottom, and you realize how much the right brush matters.
Pick well, and the job takes a minute. Pick badly, and you end up with scratched plastic, a brush that smells odd, and a bottle that only looks clean.
This guide gives you seven practical tips, from choosing the right shape to knowing when to bin the brush. It is written for parents, but it works just as well for water bottles, flasks and carafes.
Key Takeaways
- Match the brush to the bottle. It should reach the base and touch the sides without being forced in.
- Silicone is gentle and non-porous, but it can struggle with dried-on residue, so rinse bottles soon after use.
- For baby feeding items, the CDC advises using a brush that is kept only for those items, plus a separate wash basin.
- Any brush can turn grubby. Rinse it after each use, let it dry fully, and wash it every few days.
- There is no official expiry date. Replace the brush when it cracks, turns cloudy, smells, or loses its shape.
What Is a Silicone Bottle Brush, and Why Are Parents Switching?
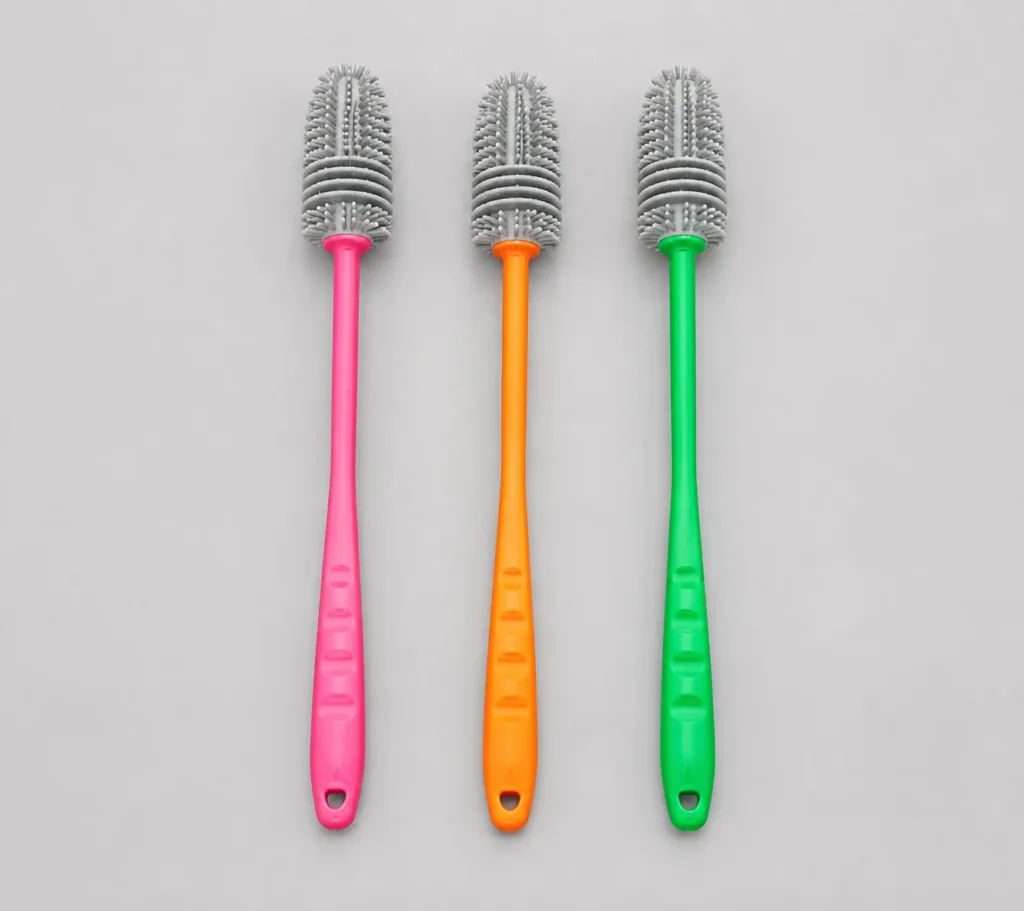
A silicone bottle brush replaces traditional bristles with soft, flexible silicone fins or fingers wrapped around a sturdy core. Because silicone is non-porous, it does not soak up milk, juice or soap the way a sponge tip can.
It is also soft. Industry guidance notes that stiff nylon can scratch delicate glass or plastic, while silicone is a gentler choice for baby bottles and laboratory glassware.
There is a trade-off, though, and most guides skip it. The same industry source points out that silicone can be less effective on dried-on buildup than stiffer bristles. That is why the tips below cover technique as much as the tool itself.
Silicone vs Nylon vs Sponge: A Quick Comparison
Here is how the three most common types of bottle cleaning brush compare in everyday use. The replacement and price figures are rough ranges from retailer guides, not official standards.
| Feature | Silicone | Nylon bristle | Sponge tip |
| Scratch risk | Low | Higher on delicate glass or plastic | Low, but varies |
| Surface | Non-porous | Bristles can hold moisture | Porous, holds moisture |
| Power on dried residue | Moderate | High | Good at first, fades fast |
| Typical replacement advice | Roughly 3 to 12 months, or when worn | Roughly 1 to 3 months | Every 2 to 4 weeks |
| Upfront price (approx.) | $5 to $15 | $2 to $10 | Usually lowest |
Tip 1: Match the Brush Shape to Your Bottle
Start with the bottle, not the brush. A wide-mouth bottle, a slim baby bottle and a tall sports bottle all need different reach.
Industry guidance suggests the brush should be sized so it flexes inside the opening. If it is too tight, it cannot bend enough to scrub. If it is too loose, it glides over the residue without shifting it.
For baby bottles, look for a silicone baby bottle brush with a head that reaches into the base and a separate small brush for nipples and valves. For tall bottles, a longer handle saves your knuckles.
Tip 2: Check the Material and the Design
If you are shopping for a silicone baby bottle brush, look for food-grade silicone and a clear statement about what it is made of. Reputable brands say so on the packaging or product page.
Then look at the seams. A one-piece silicone brush has fewer crevices where water can hide. A brush with a removable head is easier to wash thoroughly, and some heads can go in the dishwasher.
Avoid brushes with deep grooves or tiny gaps between the head and handle. If you cannot see into it, you cannot be sure it is clean.
Tip 3: Give Baby Feeding Items Their Own Brush and Basin
This is the single most useful habit, and it comes straight from the CDC. Its cleaning steps say to wash feeding items in a clean basin used only for that job, not directly in the sink, which can carry germs.
The same guidance says to scrub with a clean brush that is used only for infant feeding items. So the silicone bottle brush that cleans your baby’s bottles should never also clean the frying pan.
If you want a second silicone bottle brush for water bottles or coffee gear, that is a good idea. Just keep the two apart and label them if it helps.

Tip 4: Scrub in the Right Order
Good technique beats a fancy brush. Here is a routine that follows the CDC’s hand-washing steps for feeding items:
- Wash your hands with soap and water for 20 seconds.
- Take the bottle apart, including the nipple, ring, cap and any valves.
- Rinse each part under running water. Do not set the parts in the sink.
- Place everything in a clean basin with hot water and soap.
- Use the brush to scrub the inside walls, the base, and the threads around the neck. Twist as you go.
- Squeeze soapy water through the nipple holes so they clear properly.
- Rinse again under running water, or in a separate clean basin.
- Let everything air-dry on a clean, unused towel or paper towel.
One small warning: do not dry parts with a dish towel. The CDC says rubbing or patting items dry with a dish towel can transfer germs back onto them.
Tip 5: Deal With Stubborn Milk Film Early
Milk fat is sticky, and it sets hard once it dries. The easiest fix is timing. Give the bottle a quick rinse soon after feeding so the residue never gets a chance to harden.
When you do wash, use hot, soapy water and make several slow passes around the walls. Silicone fins are soft, so they need a little more patience than stiff bristles do.
If a film keeps returning around the threads or inside a valve, the problem is often the tool for that spot. A small nipple brush or a slim bottle cleaning brush can reach places a bigger silicone head cannot.
Tip 6: Clean and Dry the Brush Itself
A bottle cleaning brush that works all day needs cleaning too. A silicone brush resists odors and stains better than many alternatives, but it is not magic. Milk residue and trapped water can still linger in the crevices.
The CDC advises rinsing the basin and brush well after each use and letting them air-dry. It also says to wash them every few days, either in a dishwasher with hot water and a heated drying cycle (if they are dishwasher-safe) or by hand with soap and warm water.
There is a stricter rule for younger babies. If your baby is under two months old, was born prematurely, or has a weakened immune system, the CDC says to wash the basin and brush after every use.
Store the brush upright somewhere airy, not in a closed, damp container. If you want to sanitize it, check the manufacturer’s label first. Many silicone heads tolerate boiling water or a hot dishwasher cycle, but not every design does.
Tip 7: Know When to Replace It
Here is the honest answer: there is no official expiry date for a silicone bottle brush. Retailer guides give ranges from about three months to a year, which tells you it depends on use and care.
So let your silicone bottle brush tell you. Replace it if you notice any of these:
- Cracks, tears or a split where the head meets the handle
- A cloudy, sticky or dull surface that was smooth before
- A sour or musty smell that survives a proper wash
- Dark spots, staining or any fuzzy growth
- A head that has lost its shape and no longer touches the bottle walls
If your brush cleans baby bottles every day, lean toward the earlier end of the range. It costs a few dollars, and it is one of the cheapest safety upgrades in the nursery.
Beyond Baby Bottles: Other Ways to Use One
A silicone bottle brush is handy well outside the nursery. It suits water bottles, thermos flasks, glass carafes, mason jars and some coffee machine parts.
If you use one on non-baby items, keep it separate from the brush you use for feeding items. That way you follow the dedicated-brush advice without giving up a useful tool.
Common Mistakes to Avoid
- Washing bottle parts directly in the sink instead of a clean basin
- Drying with a dish towel instead of air-drying
- Leaving the brush wet in a closed cup or drawer
- Using the same brush for pans and baby bottles
- Forgetting the nipple, valve and thread area
- Keeping a worn silicone bottle brush because it still looks fine from a distance
Faqs
Are silicone bottle brushes better than bristle brushes?
It depends on the job. A silicone bottle brush is gentler on glass and plastic and does not hold moisture as easily. Stiff bristles can be better at shifting dried-on residue, so many parents keep a small bristle brush for threads and valves.
How often should you replace a silicone bottle brush?
There is no official rule. Retailer guides range from about three months to a year. Replace it sooner if it cracks, turns cloudy, smells, or loses its shape.
Can you put a silicone bottle brush in the dishwasher?
Often, yes, but check the label. Many silicone bottle brushes and removable heads are dishwasher-safe. The CDC suggests a dishwasher with hot water and a heated drying cycle for cleaning brushes and basins, if they are dishwasher-safe.
Can you boil a silicone bottle brush to sanitize it?
Many silicone brushes handle boiling water, but not every model does. Follow the manufacturer’s instructions, especially if the brush has a removable head or a plastic core.
Do silicone bottle brushes get moldy?
They can, if they stay wet. Silicone is non-porous, so it resists mold better than a sponge tip. But trapped water in seams and crevices can still cause trouble, so dry the brush fully after every wash.
Is a silicone bottle brush safe for baby bottles?
Food-grade silicone is a common choice for a silicone baby bottle brush. Look for clear material information from the brand, and follow the CDC’s advice to use a brush kept only for infant feeding items.
How do you clean a baby bottle brush?
Rinse it well after each use and let it air-dry. Then wash it every few days in a dishwasher with hot water and a heated drying cycle, or by hand with soap and warm water. For babies under two months, or those born early or with weakened immunity, wash it after every use.
Bottom Line
A good silicone bottle brush is gentle on bottles, easy to rinse, and simple to keep tidy. But it only works as well as the habits around it.
Choose the right shape, keep a dedicated brush and basin for baby items, scrub in order, wash the brush every few days, and replace your silicone bottle brush when it shows wear. Do that, and your bottles will be clean in the way that actually counts.
This article is general information, not medical advice. If your baby was born early or has a health condition, follow your pediatrician’s guidance on cleaning and sanitizing feeding items.