Fast & Safe Silicone Sealant Removal
Silicone sealant removal is the crucial first step in any bathroom or kitchen renovation to prevent mold growth and stop hidden water leaks. Understanding how to remove silicone sealant is one of the crucial skills for home repairs, bathroom caulking, and maintenance in industries. After some time, silicone sealants age, become discolored, less flexible, and may accumulate mold and mildew. The reason why just using force to scrape the surface is not sufficient lies in the fact that silicone turns into a very tough and waterproof polymer and leaves sticky spots that interfere with the adhesion of a new sealant.
Table of Contents
Essentials of Silicone Sealant Removal
The knowledge of how silicone adheres to surfaces clarifies why proper removal necessitates special procedures:
- Chemical Cross-Linked Polymers: The cured form of silicone develops cross-links that prevent water, sunlight, and common home detergents from detaching it.
- Interlocking with the Surface Mechanically: Silicone infiltrates micropores of the surface to create an interlocked connection that can only be removed either mechanically or by swelling.
- Contaminated Silicone Residue Layer: The residue layer of silicone oils prevents any new caulk from bonding.
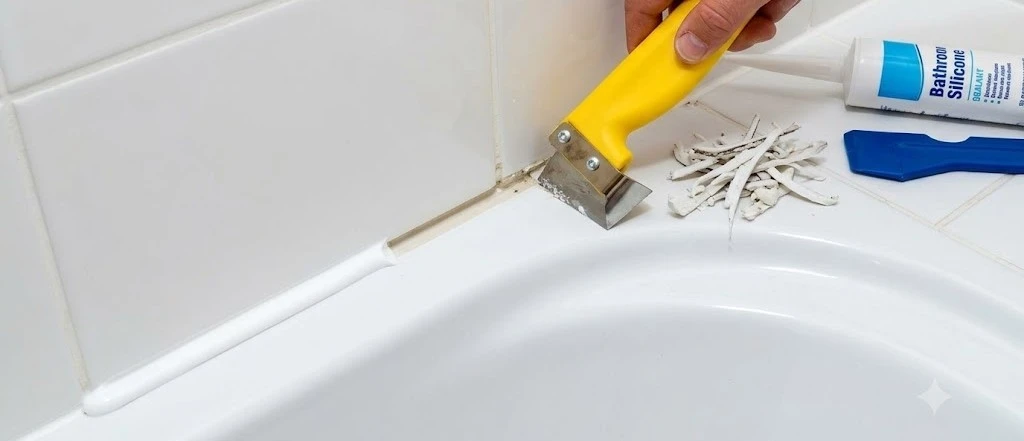
Tools and Methods Used
Silicone sealant removal becomes significantly easier when you allow a specialized chemical solvent to break down the cured polymer matrix before scraping. The following table compares common methods and tools used for stripping silicone sealants across different surfaces:
| Removal Method | Primary Tool / Agent | Target Application | Surface Safety Level |
| Mechanical Scraping | Plastic scraper or angled caulk blade | Thick outer silicone beads & tiles | High (when using plastic blades on acrylic/porcelain) |
| Chemical Softening | Commercial silicone remover / Mineral spirits | Aged, hardened, or stubborn silicone seams | Safe for glass, ceramic, and most metals |
| Abrasive Scrubbing | Non-abrasive nylon pad / Steel wool | Thin, residual film removal | Medium (avoid steel wool on soft plastics) |
| Solvent Degreasing | Isopropyl alcohol ($90\%+$ concentration) | Final surface wipe before re-caulking | High on all non-porous surfaces |
Step-by-Step Guide
Silicone sealant removal must be thorough, as even an invisible film of leftover silicone oil will completely block fresh caulk from bonding. Proper silicone sealant removal is essential before applying new caulk to ensure a waterproof seal.
- Soften the Old Silicone: Apply a commercial silicone sealant remover or mineral spirits along the entire joint, letting it sit for 20 to 30 minutes to weaken the silicone matrix.
- Slice the Boundary Edges: Using a sharp utility knife or specialized caulk removal tool, carefully score along both outer edges of the silicone bead without gouging the underlying tile or tub finish.
- Pry and Peel the Main Bead: Insert a plastic scraper under the softened edge and pull the silicone bead away in long, continuous strips.
- Scrape Away Stubborn Residue: Use a plastic scraper or non-abrasive scrub pad to lift tiny leftover bits and thin residual layers stuck in joints or corners.
- Clean and Degrease the Surface: Wipe the entire joint thoroughly with a lint-free cloth soaked in high-grade isopropyl alcohol or acetone to remove lingering silicone oils and dust.
- Allow Complete Drying: Let the surface air-dry completely for at least 15 to 20 minutes before applying fresh silicone sealant.
Risks Prevented
Mastering silicone sealant removal helps prevent mold growth behind bathroom fixtures and tiles.
- Adhesion Failure: Eliminates hidden silicone oil film that causes new caulk to peel, split, or lift within weeks of application.
- Mold and Mildew Recurrence: Completely strips away spores embedded in old, porous silicone joints before sealing the seam again.
- Substrate Surface Damage: Prevents permanent scratches and chipping on porcelain, acrylic, glass, and polished stone caused by aggressive, improper tool selection.
- Water Leaks and Structural Rot: Ensures tight, airtight seals that stop water from seeping behind walls, under floors, or through structural joints.
Precautions
Follow these measures:
- Ensure Adequate Ventilation: Always open windows or use exhaust fans when using chemical silicone solvents, acetone, or mineral spirits to prevent inhaling strong vapors.
- Test Solvents on Hidden Areas: Apply chemical removers to a small, hidden spot on painted walls, acrylic tubs, or natural stone to verify it won’t discolor or dissolve the finish.
- Avoid Metal Blades on Acrylic: Never use razor blades or metal putty knives on fiberglass, plastic, or acrylic surfaces, as they easily cause deep gouges.
- Wear Personal Protective Equipment: Wear nitrile gloves and safety glasses to shield your skin and eyes from chemical solvents and flying debris during scraping.
Conclusion
Executing effective silicone sealant removal is the secret to achieving durable, professional-looking joints during any renovation or maintenance project. By allowing chemical softeners to break down cross-linked polymers and using proper non-scratching scrapers, you can clean joints down to raw substrate effortlessly. Finishing with a thorough alcohol degrease creates the optimal surface for new silicone to bond securely, keeping your home leak-free and fresh for years to come.
Partner with Biopol Chemicals to source durable, high-grade silicone raw materials engineered to meet strict international quality and safety standards.
Frequently Asked Questions (FAQs)
1. What dissolves cured silicone sealant?
Although mild solvents will not dissolve cured silicone, commercially available silicone removers, mineral spirits, and xylene are capable of penetrating into the silicone to soften it for easy scraping.
2. Can I use new silicone sealant over the old silicone?
No. Silicone applied over silicone that is already cured will peel off very soon. It will not have any bonding capabilities.
3. How can I clean silicone sealant from my bathtub surface without scratching it?
In order to do so, one should use a plastic putty knife or nylon cleaning pad along with mineral spirits or isopropyl alcohol.
4. How much time is needed for silicone remover to act?
Commercially available silicone removers require from 20 minutes to two hours of time to penetrate the silicone bead.
Also Read