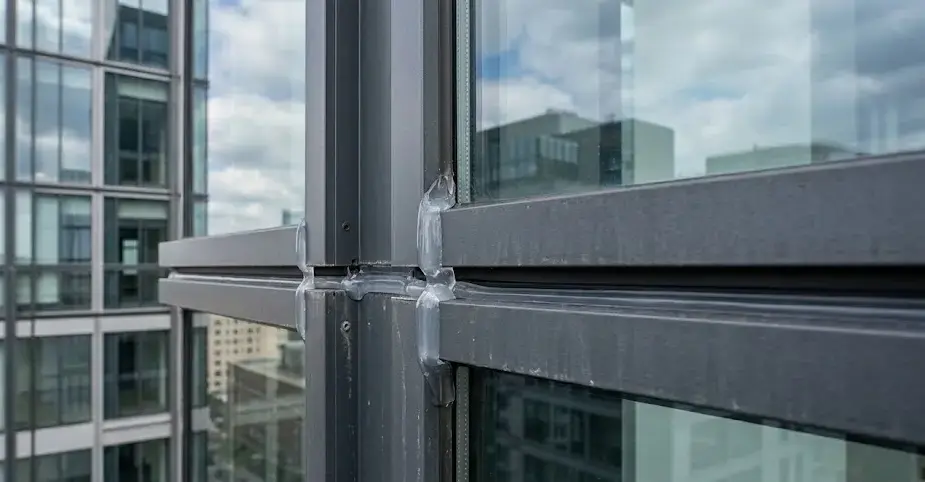
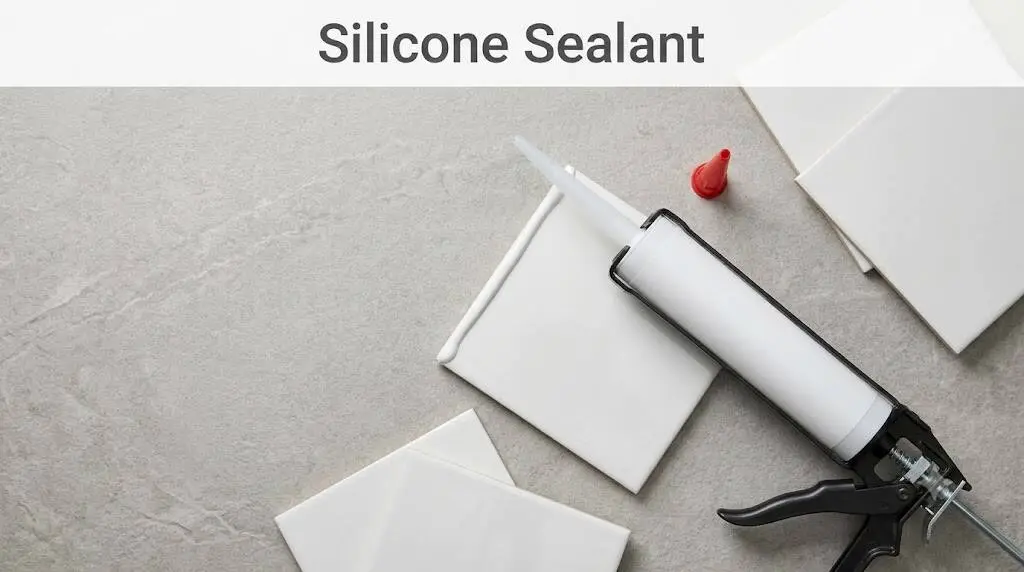
Silicone sealant is the flexible, rubbery material that keeps water out of shower corners, window frames and countless other joints around your home. It looks like a simple tube of paste, yet choosing the wrong type or skipping the prep work is a common reason a seal fails within a year.
This guide covers what it is, how it cures, the main types, where it works best and where it does not. You will also find clear steps for applying and removing it, plus the mistakes worth avoiding.
Key Takeaways
- Silicone sealant stays flexible after curing, which is why it handles movement, moisture and temperature swings so well.
- Acetoxy silicone cures fast but smells of vinegar and can corrode metals. Neutral cure types are gentler on metal, stone and masonry.
- Most silicone cannot be painted. If the joint will be painted, buy a formula that says paintable.
- A clean, dry joint matters more than the brand on the tube.
- Allow about 24 hours before water touches the joint, and longer for thick beads.
- Large gaps, structural joints and some plastics need a different product.
What Is Silicone Sealant?
In short, it is a paste-like sealing compound that cures into a flexible, waterproof and weather-resistant rubber. People use it to close joints, gaps and seams in bathrooms, windows, glass, appliances and machinery.
The compound is built on silicone polymers called polysiloxanes. Their backbone is a chain of alternating silicon and oxygen atoms, which differs a lot from the carbon chains in acrylic caulk or polyurethane. That backbone explains why silicone shrugs off heat, cold, sunlight and water.
Manufacturers also add fillers such as fumed silica, plasticizers and cross-linking agents. These control how thick the paste feels, how fast it cures and how well it grips different surfaces.
Most tubes in a hardware store are one-part, moisture-curing products, often labelled RTV silicone. RTV stands for room temperature vulcanizing. In plain words, it turns into rubber at normal temperatures, with no oven or special equipment.
How Silicone Cures, and Why It Matters
Silicone does not dry by evaporation the way paint does. It reacts with moisture in the air, forms a skin on the surface and then hardens slowly from the outside in.
Skin time is usually somewhere between a few minutes and an hour. A thin bead fully cures in about 24 hours, while thick joints can need several days. Humid air speeds the reaction up, and cold or very dry air slows it down.
Most labels allow application between roughly 40°F and 100°F, though some products set a narrower window. Always read the tube, because the chemistry inside decides how the sealant behaves.
Here is the typical timeline at a glance:
| Stage | Typical timing | What to do |
| Skin forms | A few minutes to about an hour | Tool the bead before this point, then leave it alone |
| Light water contact | About 24 hours, or as the label states | Some fast formulas are rain-ready sooner |
| Full cure, thin bead | About 24 hours | Safe for normal use |
| Full cure, thick joint | Several days | A common rule is about a day per 1/8 inch of depth |
Treat these as general ranges, since every product publishes its own times.
Main Types and What Each One Does Best
Almost every product falls into one of two cure families. After that, it splits further by purpose.
Acetoxy (Acid Cure) Silicone
Acetoxy silicone releases acetic acid as it cures, which gives off a sharp vinegar smell. It cures quickly and bonds well to glass, glazed tile and other non-porous surfaces, so it is popular for aquariums and shower enclosures.
The downside is the acid. Acetoxy silicone can corrode copper, brass and some other metals, and it may stain or etch masonry and natural stone.
Neutral Cure Silicone
Neutral cure silicone gives off alcohol or oxime instead of acid. It has little odor and is far kinder to metals, concrete, brick and many plastics.
It usually cures more slowly and costs a little more. For stone, electronics, aluminum frames or anything that corrodes, though, neutral cure silicone is normally the safer pick.
General Purpose
These all-rounders handle glass, ceramic, metal and many painted surfaces for everyday repairs. Check whether the tube is acetoxy or neutral before you use it on metal.
Kitchen and Bath (Sanitary)
Sanitary grades include mildew-resistant additives and stay flexible around sinks, tubs and showers. They do not make mold impossible, but good silicone caulk of this kind slows it down when you keep the joint clean and dry.
High Temperature
Some RTV silicone grades cope with continuous heat up to roughly 600°F. That suits oven seals, exhaust parts and engine gaskets. Match the stated temperature range to your job.
Paintable Silicone
Ordinary silicone repels paint. Paintable formulas do exist, but they are made specially, and you still need the paint and cure time the manufacturer recommends.
Structural and Specialty
Structural glazing, aquarium-safe, electrical-grade and fire-rated products are tested for specific jobs. Never swap a general product into one of those roles.
Low Modulus vs High Modulus
Modulus describes how stiff the cured rubber feels. Low modulus products stay soft and stretch easily, so they cope with movement in window frames and building joints. High modulus products cure harder and suit small, stable joints.
Neutral cure grades are mostly low modulus, and acetoxy grades are mostly high modulus. The data sheet gives the final word.
Benefits That Make Silicone a Popular Choice
- Flexibility: It stretches and compresses with the joint, so it does not crack as materials expand and shrink.
- Waterproof performance: Cured silicone repels water, which makes it a dependable waterproof sealant for wet rooms and exterior joints.
- Weather and UV resistance: Sunlight does not break it down the way it breaks down many organic sealants.
- Wide temperature range: Standard grades commonly work from about -60°F up to 400°F.
- Long service life: Quality exterior products are often rated for 20 years or more on clean surfaces.
- Strong grip on smooth surfaces: Glass, glazed ceramic and aluminum are all easy targets.
Common Uses Around the Home and Workshop
Silicone sealant earns its place wherever water, movement or heat meet a joint.
- Bathrooms and kitchens: Around tubs, showers, sinks and backsplashes. This is where bathroom waterproofing usually starts or ends.
- Windows and doors: Exterior perimeters and glazing, where a waterproof sealant that survives weather counts.
- Glass and aquariums: Use aquarium-safe formulas only.
- Roof details: Around vents, flashings and skylights, where the label allows it.
- Appliances and electronics: Sealing cables, sensors and housings. A neutral cure product is the safer option here.
- Automotive and machinery: Gaskets, lamps and housings that see heat and vibration, where RTV silicone is the usual choice.
- Pipes, wires and small cracks: Seal the gap where lines enter a wall, or fill hairline cracks in concrete and masonry. Larger or structural cracks need a proper repair first.
Where Silicone Sealant Falls Short
- Painted finishes: Most silicone will not hold paint. Use a paintable formula or acrylic caulk when the joint must match trim.
- Large gaps and structural joints: Silicone is not a filler, and it is not load-bearing unless it is rated structural. Wide joints need a backer rod behind the bead.
- Some plastics: Polyethylene, polypropylene and PTFE resist bonding. Test a small area first.
- Natural stone: Standard formulas can leave oily stains on marble or granite. Choose a stone-safe, neutral cure product.
- Damp or dirty surfaces: Moisture, dust and grease break the bond before it forms.
- Tricky surfaces: Some painted metals and porous materials grip better with a primer or adhesion promoter. Use the one the manufacturer names.
Silicone vs Other Sealants
Every material has a job. This quick comparison shows where silicone fits.
| Sealant | Flexibility | Water resistance | Paintable | Best for |
| Silicone | Excellent | Excellent | Usually not | Wet areas, glass, windows, high movement |
| Acrylic latex caulk | Low to moderate | Fair | Yes | Indoor trim and small dry gaps |
| Polyurethane | High | Very good | Yes | Exterior joints, concrete, masonry |
| Hybrid (MS polymer) | Good | Very good | Yes | Mixed materials, jobs that need paint |
In short, silicone wins in wet or moving joints. Acrylic caulk or polyurethane sealant makes more sense when you need to paint over the result.
Colors, Packaging and Tools
Clear and white are the most common colors. Black, grey, brown and almond are easy to find as well. Clear blends in on glass and on patterned surfaces, while a matched color gives tile joints a tidy finish.
Sealant comes in squeeze tubes and in cartridges. Tubes suit small touch-ups. Cartridges fit a caulking gun, which gives steadier pressure and a more even bead on longer runs.
A few cheap extras make the job easier: a utility knife, a plastic scraper, painter’s tape, a smoothing tool and isopropyl alcohol.
How to Choose the Right Silicone Sealant
Run through these questions before you buy:
- What are you sealing? Match the formula to glass, metal, stone, masonry or plastic.
- Indoors or outdoors? Outdoor joints need UV-stable, weatherproof grades.
- Will it stay wet? Pick a sanitary, mold-resistant grade for showers and sinks.
- Will you paint it? If yes, buy a paintable product.
- How much will the joint move? Windows and facade joints need higher movement capability.
- What temperatures will it face? Check the stated range on the label.
- Which cure type? Acetoxy suits glass and ceramic. Choose neutral cure silicone for metal, stone and masonry.
This quick reference shows which type usually suits which surface:
| Surface | Best pick | Watch out for |
| Glass, glazed tile, ceramic | Acetoxy or general purpose | Works well on non-porous surfaces |
| Bathroom and shower joints | Sanitary, mildew-resistant grade | Keep the joint clean and dry |
| Metal, aluminum, copper | Neutral cure | Acid grades can corrode |
| Concrete, brick, masonry | Neutral cure | Acid grades can etch |
| Natural stone | Stone-safe neutral cure | Standard grades can stain |
| Ovens, exhausts, engines | High-temperature RTV | Match the temperature range |
| Painted joints | Paintable formula | Regular silicone repels paint |
For exterior or commercial joints, look for a product that meets ASTM C920, the standard specification for elastomeric joint sealants. If you want to see how different sealant types are judged, this ASTM paper evaluating building sealants against C920 is a useful read.
Joint Design Basics
A well-planned joint matters as much as the product. Silicone should grip the two sides of the joint only, so it can stretch like a rubber band. If it also sticks to the bottom, it tears when the joint moves.
- Depth: For joints wider than about half an inch, aim for a bead depth of roughly half the width. Check the data sheet for exact limits.
- Backer rod: A closed-cell foam rod fills deep joints and sets the right depth.
- Bond breaker: Where a rod does not fit, bond breaker tape stops the bottom from sticking.
- Movement: Look up the movement capability on the data sheet and pick a joint width that suits it.
- Primer: If the data sheet asks for one, apply it before the bead.
How to Apply Silicone Sealant Step by Step
Good results come from patience more than skill.
- Check conditions. Work in dry weather, within the temperature range on the label, and open a window or run a fan.
- Remove the old sealant. Cut it out completely, because new silicone will not stick to an old silicone film.
- Clean and dry. Wipe the joint with isopropyl alcohol or the cleaner the manufacturer suggests, then let it dry fully.
- Mask the edges. Painter’s tape on both sides gives a crisp, straight line.
- Cut the nozzle. Snip at roughly 45 degrees so the opening is a little smaller than the joint, then pierce the inner seal.
- Apply the bead. Hold the gun at an angle and move steadily in one pass, pushing the bead into the joint instead of dragging it on top.
- Tool the surface. Smooth it with a tooling spatula or a gloved finger within a few minutes, before a skin forms. Follow the label if it recommends soapy water.
- Pull the tape. Peel it away at an angle while the sealant is still wet.
- Let it cure. Keep the joint dry and untouched for at least 24 hours, longer for thick beads.
If you are caulking a bathtub, fill it with water before you start. The weight opens the joint to its widest position, so the finished seal is less likely to tear when the tub is in use.
Clean up as you go. Wipe fresh excess with a dry cloth straight away, then use mineral spirits or isopropyl alcohol on your tools. Acetone also cleans tools but can damage some plastics, so keep it off your surfaces.
Wear gloves to make life easier, and wash skin with soap and water afterward. Cured residue needs scraping or a silicone remover.
How to Remove Old Silicone
Removing old silicone is tedious, but fresh sealant needs a bare surface to grip.
- Slice along both edges with a utility knife, taking care not to scratch the surface.
- Peel or scrape the strip out with a plastic scraper.
- Apply silicone remover gel and wait as directed to soften what is left.
- Wipe away the residue with isopropyl alcohol and let the area dry.
The same method works when removing old caulk of other kinds, although the right solvent can differ.
Why Mold Grows on Silicone and How to Handle It
Silicone resists mold better than many materials, but it is not immune. Mildew-resistant additives wear off over time, and soap scum, steam and poor ventilation give mold a place to grow.
- Surface stains: Clean with a mold cleaner or diluted bleach, rinse well and dry. Never mix bleach with other cleaners, and ventilate the room.
- Deep stains: If black spots run through the bead, cutting it out and replacing it is the only lasting fix.
- Prevention: Run the fan, squeegee after showers and wipe the joint dry.
Troubleshooting Common Problems
Most failures trace back to preparation or conditions, not the product. Here is what to check.
- Stays tacky or soft: The air may be too cold or dry, the bead too thick or the tube past its date. Give it extra time, and if it is still soft after a few days, remove it and start again.
- Bubbles in the bead: Air in the cartridge or moisture in the joint is the usual cause. Dry the joint well and press out air before you start.
- Pulls away or shrinks: Common in wide joints with no backer rod, or where the joint moves more than the product allows.
- Peels at the edges: Usually a dirty, oily or hard-to-bond surface. Clean again, and use a primer if the data sheet suggests one.
- Discolors or stains: Mold, harsh cleaners and contact with certain plastics or rubbers can all cause it. Test a small area first.
- Strong vinegar smell: Normal for acetoxy products while they cure. It fades once the sealant has set.
Two typical cases show how this plays out. A bead of acetoxy grade next to brass fittings can leave green corrosion marks, while a neutral cure grade avoids the problem. And a tub sealed while empty often cracks the first time it is filled.
Common Mistakes to Avoid
- Laying new silicone over old or dirty sealant.
- Using acetoxy silicone on metal or natural stone.
- Making the bead too thick. A depth of about half the joint width is a good rule for wider joints.
- Skipping the backer rod in deep joints.
- Tooling after a skin has formed, which tears the surface.
- Letting the joint get wet before it has cured.
Safety, Storage and Lifespan
Cured silicone is stable, but fresh sealant deserves sensible handling. Ventilate the room, wear gloves and keep it away from your eyes. Acetoxy products release acetic acid fumes while curing, which can irritate the nose and eyes.
On job sites, sealants sit alongside many other products that need care, so it helps to know the common chemical hazards on a construction site and to read each product’s safety data sheet.
If a joint will touch food or drinking water, such as around a food-prep surface, choose a product certified for that use. NSF certification is a common marker. A standard tube is not automatically food-safe.
Store tubes somewhere cool and dry, and check the date code. Unopened tubes often keep for a year or more. Use opened tubes up quickly, since the sealant starts to skin in the nozzle.
Quality exterior silicone can last 20 years or more in good conditions. Bathroom joints are tougher on it, so check them once a year. Reseal when you see cracks, peeling or black mold that will not wipe away.
FAQ
Is silicone caulk the same as silicone sealant?
Mostly, yes. Caulk is the everyday word for a gap filler, while sealant usually points to a more flexible, higher-performance product. In practice, silicone caulk and the sealant sold in tubes describe the same rubber-like material, so check the label for movement capability and intended use.
How long does silicone sealant take to dry?
A skin forms in minutes to an hour, and a thin bead cures in about 24 hours. Thicker joints, cold weather or low humidity can stretch that to several days. Keep water away until the label says it is safe.
Can you paint over silicone sealant?
Not usually. Standard silicone repels paint, and the paint tends to bead up or peel. Use only products labelled paintable, and test a small area first.
Is silicone sealant waterproof?
Yes, once it has fully cured. It is one of the most reliable waterproof sealant options for tubs, showers, windows and exterior joints, but only if the surface was clean and dry when you applied it.
How do you remove old silicone?
Cut it out with a utility knife, scrape off the bulk, soften leftovers with silicone remover and wipe the surface with isopropyl alcohol.
Bottom Line
Silicone sealant earns its reputation through flexibility, waterproofing and long life, but only when you pick the right type and prepare the joint properly. Choose acetoxy for glass and ceramic, neutral cure for metal and stone, and a paintable or specialty formula when the job demands it. A clean, dry joint and a full 24-hour cure do the rest.