A silicone loaf pan sounds like the answer to every sticky banana bread disaster. It bends, the loaf slides out, and cleanup takes seconds. Yet it also flops around when full, bakes paler crusts, and has recently drawn some safety questions.
So is it worth keeping in your kitchen? In most cases, yes, provided you choose a good one and use it properly. Below, you will find what the research says, how to pick a quality pan, and the steps that give you tender, even loaves.
Key Takeaways
- Choose food-grade silicone that feels thick and springs back when you pinch or twist it.
- Always set a filled silicone loaf pan on a rigid baking sheet before it goes into the oven.
- Grease lightly with butter, even if the label promises a nonstick surface.
- Expect paler, softer crusts than metal gives you, so judge doneness with a skewer or thermometer instead of colour.
- New silicone bakeware releases the most residue early on, so wash and heat a new pan in a ventilated kitchen before first use.
What Makes a Silicone Loaf Pan Different?
Silicone is a flexible, rubber-like material built from chains of silicon and oxygen. Silicone bakeware tolerates a hot oven and a cold freezer, so one pan can bake meatloaf on Sunday and set a frozen dessert on Monday.
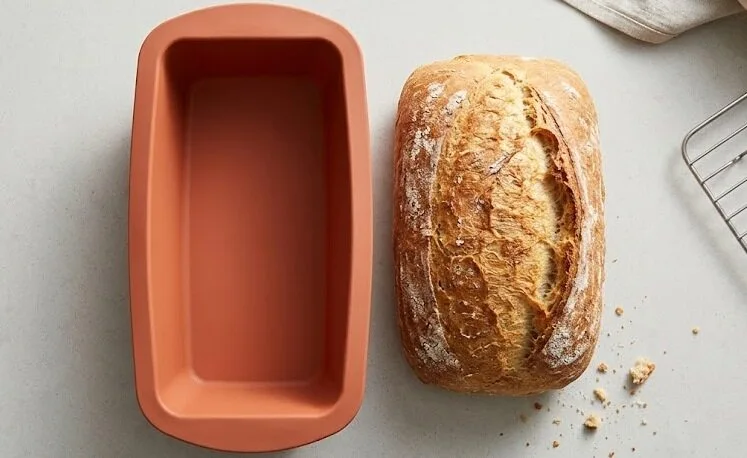
Metal conducts heat quickly and browns the outside of a loaf. Silicone is gentler, so the crust stays lighter. A 2007 study in the Journal of Foodservice compared cakes baked in both materials. Metal produced better crust colour, texture and moisture, while silicone produced slightly more volume.
In plain words, a silicone bread pan trades a golden crust for easy release and simple storage. Whether that trade suits you depends on what you bake.
Is a Silicone Loaf Pan Safe to Bake In?
Start with the reassuring part. Food-grade silicone bakeware is regulated as a food-contact material in the United States, and it is generally considered stable at normal baking temperatures.
Newer research adds some nuance, though. Health Canada scientists tested 25 new silicone baking products, including loaf pans, cupcake molds and cookie sheets. Each one was baked for an hour at roughly 350°F with an oil-and-sand mixture standing in for batter. Every product contained cyclic siloxanes, which are small leftover molecules from manufacturing, and some of them moved into the mixture and the surrounding air.
A few details help put that in context:
- Release fell sharply over the first few bakes, so older pans shed less than new ones.
- Pieces with more exposed surface area released more.
- The authors did not measure health effects, and a 2023 federal assessment found that siloxanes are not harmful to human health or the environment.
- Modelling suggested that children could have higher exposure for their body weight.
None of this is a reason to panic. It is a reason to buy carefully and build a few habits.
Safer habits for any silicone baking pan:
- Buy a pan labelled food-grade from a brand you can actually look up.
- Wash a new pan, then heat it empty at your usual baking temperature in a well-ventilated kitchen. Researchers suggest that early use is when most release happens.
- Stay under the temperature printed on the pan. Many are rated to about 446°F (230°C), but check yours.
- Retire any pan that turns sticky, cracks, tears or smells strongly of chemicals.
- Keep it away from open flames, broilers and direct burner contact.
Silicone Loaf Pan vs Metal: Quick Comparison
| Feature | Silicone | Metal |
| Release | Peels away easily and is gentle on delicate batters | Needs greasing or lining and can stick |
| Crust | Pale, soft sides | Golden, crisp edges |
| Stability | Floppy, so it needs a baking sheet | Rigid and easy to carry |
| Cleaning | Hand wash or dishwasher, but can hold an oily film | Easy, though it can scratch or rust |
| Storage | Stores flat, but creases weaken it | Bulky, though it stacks |
| Freezer and microwave | Generally fine | Freezer fine, not microwave safe |
How to Choose a Good Silicone Bread Pan
Quality varies a lot between brands of silicone bakeware, and cheap pans are where most problems start. Look for these signs:
- Food-grade labelling. The packaging should say so clearly. Vague wording is a red flag.
- Thickness. A flimsy pan sags and bakes unevenly. Thicker walls feel more substantial.
- The pinch test. Pinch or twist a flat part. If white streaks appear, the pan may contain fillers. It is not a lab test, but it is a handy one.
- Size. A standard 9 by 5 inch pan fits most recipes, while an 8.5 by 4.5 inch version suits smaller loaves.
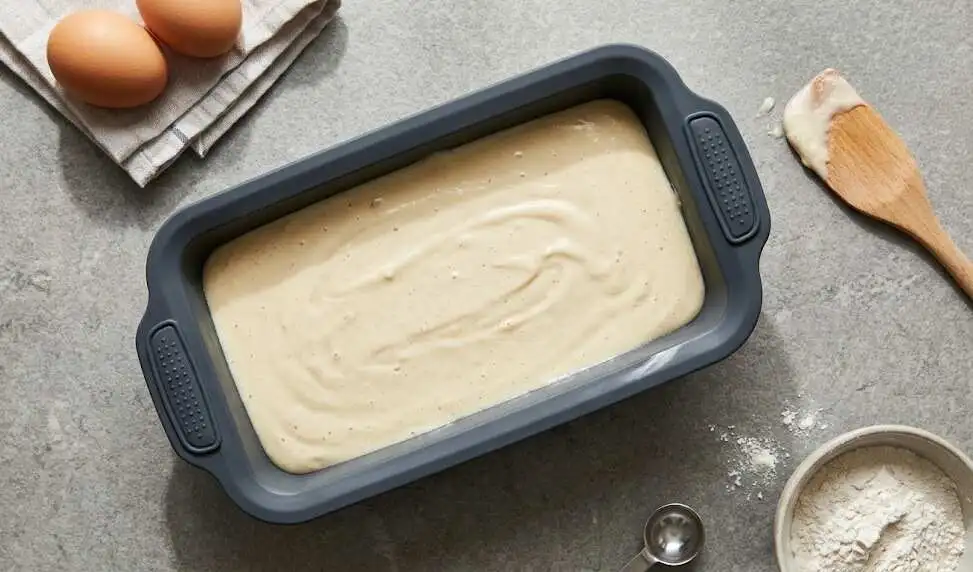
- Support. Some pans have a built-in rigid frame or sturdy rim, which makes lifting far less stressful. The most common buyer complaint is flimsy walls that cave in at the sides once the pan is full.
- Smell. A strong chemical odour straight out of the box is a good reason to return it.
- Temperature rating. Make sure it covers the heat your recipes need.
Common Loaf Pan Sizes and When to Use Them
| Size | Best for |
| 8.5 x 4.5 inches | Smaller loaves and recipes written for compact pans |
| 9 x 5 inches | The standard choice for banana bread, pound cake and meatloaf |
| 9.5 x 5 or 10 x 5 inches | Generous batches; check that your batter volume suits it |
| Mini loaf cavities | Gift loaves, portion control and quick bakes |
Mini sets with several cavities are popular for gifting. They finish faster than full-size loaves, so start checking sooner and keep the whole tray on a baking sheet.
Silicone Loaf Pans Worth Comparing
If you are ready to buy, run the checklist above against the product page before you add anything to your cart. A good listing states the silicone grade, the exact dimensions, the maximum oven temperature and whether the pan is dishwasher safe. Then scan the reviews for words like sag, smell and sticky, which point to the problems covered in this article.
The three pans below are real, widely sold examples. They have not been tested or endorsed here, so treat them as a starting point for comparison:
| Pan | What the listing says | Check before buying |
| Lékué Silicone Loaf Pan | Made from 100% platinum silicone and dishwasher safe. Retailers list a 25 cm (about 10 in) size and a longer 29.5 cm (about 11.6 in) size. | Listed heat resistance is 220°C (428°F), a little below the 230°C (446°F) many pans carry. Check the volume too: the 25 cm size holds about 1.2 liters. |
| Mrs. Anderson’s Silicone Loaf Pan (HIC) | Described by the maker as 100% European-grade silicone, suited to quick breads, loaf cakes and meatloaf. | Confirm the size and oven rating on the seller’s page. It still needs a baking sheet for support, and the maker says not to cut inside the pan. |
| SILIVO silicone loaf pans | Sold as 8.9 x 3.7 inch molds and also inside a multi-piece silicone bakeware set. Marketed as BPA-free, food-grade silicone. | The mold is narrower than a standard 9 x 5 inch pan, so recipes may need scaling. Decide whether you want a single pan or a set. |
Features, sizes and availability change often, so confirm every detail on the seller’s page before you buy.
How to Use a Silicone Loaf Pan, Step by Step
- Wash and dry the silicone baking pan before first use.
- Grease it lightly with soft butter. Some labels say greasing is optional, but a thin coat is the safe default. Aerosol sprays can leave a sticky film that builds up over time.
- Place the pan on a rigid baking sheet before you add the batter.
- Fill it about two-thirds full so the loaf has room to rise, then smooth the top.
- Carry the baking sheet, not the pan, into the oven.
- Start checking a few minutes early. Some bakers find that silicone cooks slightly faster, while others see little difference, so note your own timing.
- Test with a skewer for quick breads, or use an instant-read thermometer for yeast loaves. Roughly 190°F to 205°F inside is typical, depending on the dough.
- Cool the loaf in the pan for 10 to 15 minutes, then peel the sides back and turn it onto a wire rack.
What to Bake in a Silicone Loaf Pan
Quick breads are the sweet spot. Banana bread, zucchini bread and pound cake all release cleanly, and delicate or flourless cakes slide out without breaking.
Savoury bakes work well too. Meatloaf and pâté keep their shape, and you can freeze a loaf-shaped dessert in the same pan with no fuss.
Yeast bread is possible but less satisfying. The crust stays pale and the sides stay soft, so crusty sourdough or a rustic sandwich loaf usually does better in metal or a Dutch oven. If you do use silicone for yeast dough, brush the top with egg wash or melted butter for a little more colour.
Common Mistakes to Avoid
- Lifting a full pan by its edges. It bends, and batter spills.
- Overfilling, which makes the loaf rise unevenly or overflow.
- Cutting inside the pan with a sharp knife. Use a plastic or wooden tool, or lift the loaf out first.
- Using abrasive scrubbers, which scuff the surface and trap residue.
- Folding or stacking a silicone baking pan tightly. Creases can weaken the shape.
Troubleshooting Common Problems
| Problem | Likely cause | Fix |
| Sunken or bowed sides | Thin walls and no support | Use a baking sheet or a framed pan, and do not overfill |
| Pale, soft crust | Silicone insulates the batter | Brush the top with butter or egg wash, or use metal next time |
| Gummy centre | Loaf looked done before it was | Test with a skewer or thermometer and add a few minutes |
| Sticky film on the pan | Aerosol spray buildup | Soak in hot soapy water, then scrub gently with baking soda paste |
| Lingering smell | Absorbed fats or a poor-quality pan | Wash well and air it out; replace the pan if the smell stays |
How to Clean and Store Your Silicone Baking Pan
Hot soapy water does most of the work, and many pans are dishwasher safe. If a greasy film builds up, scrub gently with a paste of baking soda and water, then rinse well.
Dry the pan fully and store it flat or loosely rolled. Keeping it free of creases helps it hold its shape for years.
Frequently Asked Questions
Is a silicone loaf pan safe to bake in?
Food-grade pans are generally considered low risk at normal baking temperatures. Research shows that new pans can release small amounts of cyclic siloxanes, mostly during early use. Wash it, heat it empty once, and stay within the temperature limit.
Do you need to grease a silicone loaf pan?
Usually a light coat of butter gives the cleanest release, even on pans sold as nonstick. Skip heavy aerosol sprays, which can leave a sticky buildup.
Do you bake differently in a silicone bread pan?
Mostly the same recipe works. Place the pan on a baking sheet and begin checking a few minutes early. A skewer or thermometer is more reliable than colour.
Why is my bread pale in a silicone loaf pan?
Silicone insulates, so the surface browns less than it does in metal. Brush the top with butter or egg wash, or switch to a metal pan when a crisp crust is the goal.
Can a silicone loaf pan go in the microwave, freezer or air fryer?
Generally yes, because silicone handles cold and moderate heat well, but always read the maker’s label first. For an air fryer, make sure the pan fits with room for airflow and stays clear of the heating element.
Bottom Line
A silicone loaf pan is a practical, forgiving tool for banana bread, pound cake and meatloaf, as long as you buy a quality one and give it support. Treat it as a break-in-first item, keep it within its temperature limit, and replace it when it shows wear.
Choose metal when you want a crisp, deeply browned crust. Choose silicone when easy release, simple storage and freezer flexibility matter more. Either way, you now know how to get a great loaf out of it.